
How It Works
Three steps to a protected finish
The ISPT™ creates a protective barrier during disassembly and reassembly, helping reduce the risk of cosmetic damage commonly known as an idiot scratch.
- 01
Install ISPT™
Fit the tool to your slide and frame before you begin. It seats securely and stays out of the way while you work.
- 02
Perform Maintenance
Disassemble and reassemble as usual. The ISPT™ creates a protective barrier that helps reduce the risk of cosmetic damage commonly known as an idiot scratch.
- 03
Remove & Store
Take it off, give it a wipe, and store it with your cleaning kit so it's ready for the next session.
Ready to protect your finish?
Find the right ISPT™ for your model in the shop.
Watch it in action
Detailed walkthrough
Every step of disassembly and reassembly, photographed on a 1911-style pistol — the same idea applies to any ISPT™-compatible pistol.
Disassembly
-
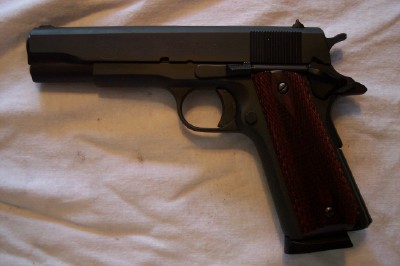
1. Before You Begin
Follow all rules for safe handling of firearms and the warnings in your owner's manual. Always treat the gun as if it's loaded, and keep ammunition out of your workspace.
-
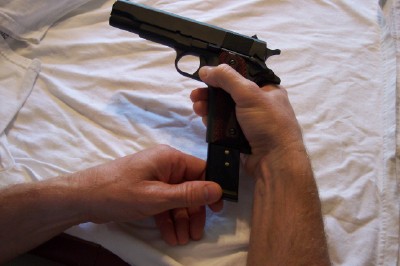
2. Remove the Magazine
Remove the magazine from the pistol. Make sure there's no ammunition anywhere nearby.
-
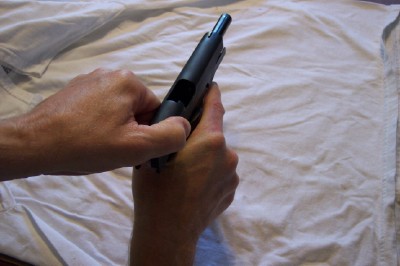
3. Clear the Chamber
Clear the chamber to confirm the pistol is fully unloaded.
-
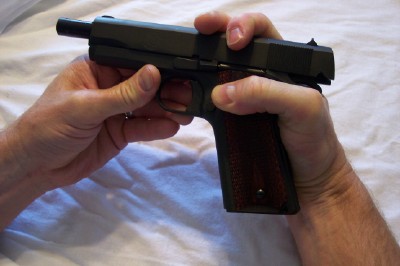
4. Retract to the Clearance Notch
Retract the slide to the point where the slide stop can be removed — on a 1911-style pistol, that's when the lug on the slide stop lines up with the clearance notch.
-
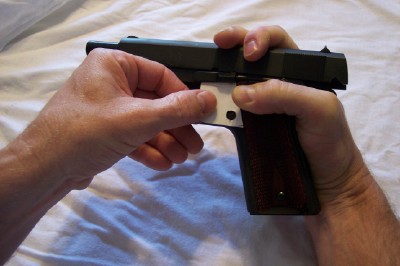
5. Insert the ISPT™
Push the slide stop pin out just slightly — enough to fit the ISPT™ onto the left side of the pistol, with the magazine release button coming through the hole in the tool.
-
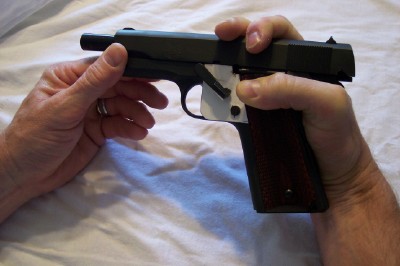
6. Remove the Slide Stop
Completely remove the slide stop. The ISPT™ keeps its lug from scratching the frame as it comes free.
-
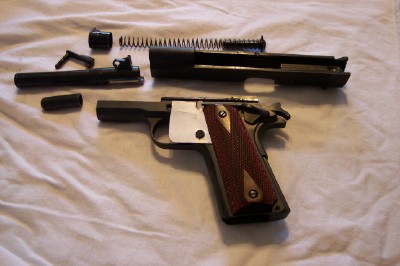
7. Complete Disassembly
Continue with your pistol's normal disassembly steps. Watch for recoil spring tension.
Reassembly
-
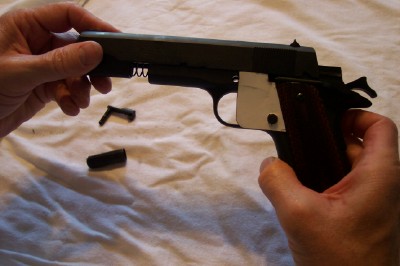
1. Begin Reassembly
If you removed the ISPT™, place it back on the left side of the pistol with the magazine release button through the hole, then begin reassembling the slide as usual.
-
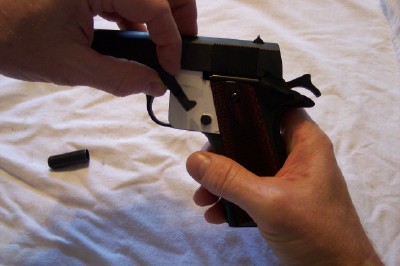
2. Insert the Slide Stop Pin
Insert the slide stop pin (through the barrel link too, if your pistol has one).
-
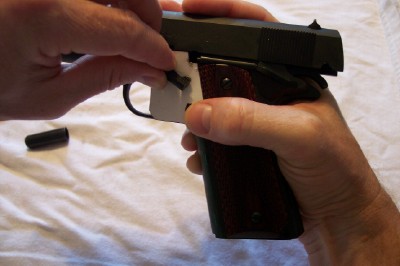
3. Rotate the Slide Stop Upward
This is where the ISPT™ really earns its keep. The slide stop has to be pushed in and rotated upward into the clearance notch — often while resisting recoil spring tension. This is normally where an idiot scratch happens; with the ISPT™ in place, the frame stays protected.
-
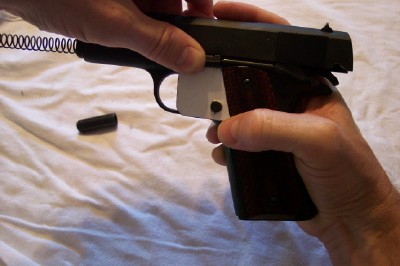
4. Insert the Slide Stop Lug
Insert the slide stop lug through the clearance notch in the slide.
-
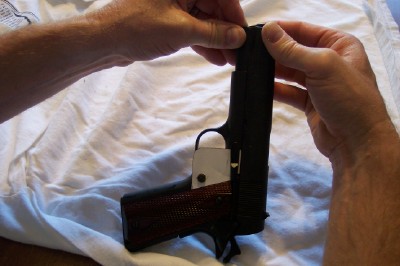
5. Finish Reassembly
Finish reassembly as specified in your pistol's user manual.
-
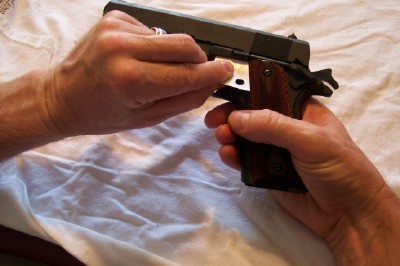
6. Remove the ISPT™
Remove the ISPT™ — depending on your model, you may need to push the slide stop slightly outward to release it.
-
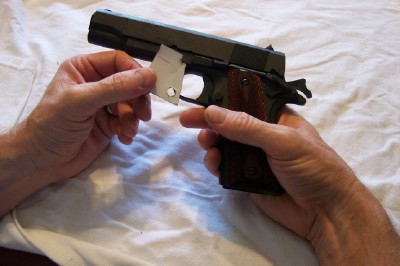
7. Complete
Disassembled and reassembled — without a single scratch on the frame.